Every woman who wants to always be well-groomed and beautiful, at least once in her life, has thought about how to build up her nails at home.
An ideal manicure allows you to not only complement the image, but also gain confidence in your own charm.
How to build nails at home: the necessary tools and devices
There are two methods of nail extension - on forms and on tips. Consider what tools are needed for this procedure.
1. An ultraviolet lamp is needed no matter which of the methods your extended artificial nails are created. A 9 W budget lamp is quite suitable for you if acrylic or a transparent gel is used for nail extension. If you plan to experiment with color gels, then you will need a more powerful lamp.
2. Manicure scapula is necessary in order to tidy the cuticle. It can be either metal or plastic. A wonderful alternative to the shoulder blade will be a regular orange stick.
3. The file. Experts recommend using a tougher tool for acrylic, the grain of which is no more than 80 grit. For a gel, a file with a roughness of 100 grit is suitable.
4. Glue with a dispenser.
5. Forms or tips.
6. Brushes. For acrylic, a tool made of drop-shaped natural materials is used. For gel - an artificial flat brush.
7. Tweezers are needed when working with forms.
Now let's talk about the necessary materials and preparations that should be purchased before the procedure.
1. A disinfectant. Experts advise using the Kutasept solution for treating hands, and Bacillol for disinfecting instruments. You can’t save on disinfectants. A natural nail after coating with acrylic or gel does not come into contact with the external environment, therefore it is very important to eliminate all bacteria and microbes before the procedure.
2. The dehydrator is necessary for drying and thoroughly cleaning the nail plate from any contamination immediately before the manicure procedures. The tool provides reliable bonding of acrylic or gel with marigolds, prevents the occurrence of chips and peeling.
3. The primer is used to dehydrate a natural nail before extension. The tool allows you to properly and reliably fix the material, as well as prevent cracking, crumbling or peeling of the nails. The product prevents the appearance of various defects, including white stripes.
4. To create a neat gel nails you will need a starter drug such as a bonder. It is applied on top of the primer and serves as a bond between a natural nail and artificial material. The product has a gel texture.
5. Gel sculptural (building) for modeling the nail. It has a dense texture, but it is very easy to apply and self-level on the nail plate.
6. Acrylic powder is a fine polymer powder. Thanks to her, artificial nails become more plastic, do not break and do not peel. Various shades of material allow you to create the desired shade.
7. The monomer is used to stabilize and even out the color of the acrylic coating. It protects the structure of artificial nails from ultraviolet rays, preventing their yellowing. The monomer also increases the elasticity and plasticity of acrylic nails.
You can purchase all the necessary tools and tools for nail extensions at professional points of sale. You can opt for kits designed for home use.
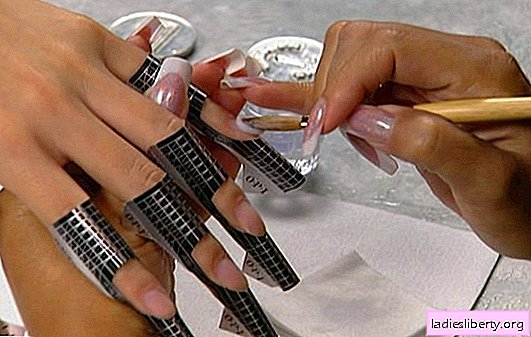
How to build nails at home: a photo and a sequence of actions
Preparation of nails for building
Regardless of the technology and material used for building, nail preparation involves five main steps:
1. Cleansing the nail plate from varnish and dirt.
2. Cuticle processing.
3. Leveling the surface of the nail with a nail file. Elimination of a brilliant layer.
4. Removing dust with a brush.
5. Degreasing nails.

Acrylic Nail Tips
This nail extension technology is available to everyone and does not require any specific skills. Consider the procedure step by step.
1. We process tools with a disinfector.
2. We prepare tips. To do this, we select the width of the artificial nails in such a way that it matches the natural plates.
3. We give tips the necessary form.
4. We process the nails with “Kutasept” and gently dry them with “Dehydrator”.
5. Gently move the glue on the surface of each nail and apply tips. Make sure it is properly positioned and hold it for a while. So glue all 10 marigolds.

6. Apply a primer and a bonder to a natural nail.
7. Dry the bonder under an ultraviolet lamp for no more than 2 minutes.
8. Apply acrylic to prepared nails. We try to correctly form the shape of the nails so that they not only provide aesthetic pleasure, but also do not break.
To make the nails at the same time thin and strong, it is very important to apply more material in the center of the plate than on the rest of the surface. To the edge of the nail, its amount should be the smallest.

We distribute the material on the nail. If we use a gel, then be sure to polymerize it in a lamp. Repeat manipulations for all nails.
9. We remove all errors using a nail file, making the shape as natural as possible.
10. We cover the nails with a finishing gel. Then for 2 minutes, dry it in a lamp.
Gel nail extension on forms
It is believed that nail extension on forms is more painstaking work requiring special skills. The form is a pattern that allows you to create the perfect model for each nail. To use it, you need to leave a free nail edge of about 3 mm.
1. The edges of the mold are fixed on the underside.
2. We apply the gel, starting from the middle of the nail. We continue to distribute it in shape until the required length is obtained.
3. Dry the nails under the lamp for 3 minutes.
4. We apply the second layer of gel, having retreated 2 mm from the cuticle.
5. Now dry the nails under the lamp for 6 minutes.
6. We remove the stencil and with the help of a nail file we give the nail plate the desired shape.
7. We collect the gel and apply so that a convex droplet forms in the center of the nail. After 5 seconds, we begin to dry the nails in the lamp - in a horizontal position, palm top.
8. Finished nails are processed with a nail file and apply the last, thin layer of gel coating.
9. Dry under the lamp for 12 minutes.

How to build nails at home without a UV lamp
1. Apply primer to prepared nails.

2. We fix the desired shape.
3. Using a brush, we collect the liquid and squeeze it well. Now we take a ball of powder and distribute it over the entire surface of the nail, forming the desired shape. Moving upward in form, we do not reach the cuticle of 1 mm.
4. When the material hardens completely, remove the mold.
This acrylic technology is used when you need to save time. Another advantage of this extension is that it does not provide for the use of an ultraviolet lamp.
Contraindications to nail extensions
Before you build your nails at home, you should make sure that you have no contraindications for this procedure. It is better for women to refuse artificial nails in the following cases:
• with nail damage by fungus;
• with constant intestinal disorders;
• with diabetes;
• while taking antibiotics or hormonal drugs;
• with cardiovascular diseases.
For those who have not yet decided whether to extend their nails or not, it is worth highlighting the main advantages and disadvantages of this procedure.
Benefits:
• Well-built nails almost do not differ from real ones.
• Masking imperfections and defects of real nails.
• Ability to make any nail art.
• Quickly getting used to the new length and shape of artificial nails.
Disadvantages:
• The procedure requires cash costs.
• Artificial nails twice a month need correction.
• Own nail plate, after removing the gel or acrylic coating, is slightly thinner and needs care.
How to build nails at home: professional tips
Even short, sloppy nails in just a few hours can give a presentable appearance. To create artificial nails, you can use both acrylic and gel.
According to professionals, the gel is not as allergenic as acrylic. Under it, the nails do not deteriorate so much. But in case of damage, the gel nail must be removed completely (sawed off) and only then build up a new one.
Acrylic extension technology does not require a UV lamp. Nails are resistant to bends and temperature changes. With regrowth, artificial plates allow you to maintain the natural shape of the nail. Acrylic is very convenient to remove: just drop your fingers in a special solution. This type of marigold makes it possible to do aquarium nail art.
In order not to be disappointed in artificial nails, professionals recommend listening to the following recommendations:
• Conduct a nail strengthening course a week before the planned extension. You can make all kinds of masks and baths.
• To avoid unpleasant sensations during the procedure, it is better to do a manicure 3-4 days before nail extensions.
• Despite the strength of artificial nails, you should be very careful in the first few days after the procedure. In order not to break them, you should avoid sudden movements, carefully type on your computer, fasten zippers and buttons.
• Before applying nail polish, the surface of the nail plate should be covered with a special base. To remove a varnish covering it is necessary only with a liquid which does not contain acetone.
• Extension nails do not like sudden changes in temperature. They can crack if, for example, coming from a frost, you immediately begin to wash your hands with hot water.
• To return to natural nails a healthy color after removing the artificial nails, you should lower the fingers for a few minutes in lemon juice.
Now you know how to build nails at home. This procedure will require scrupulousness and perseverance from you, but the results will not be long in coming. Well-groomed strong nails are the pride of every woman who loves herself.