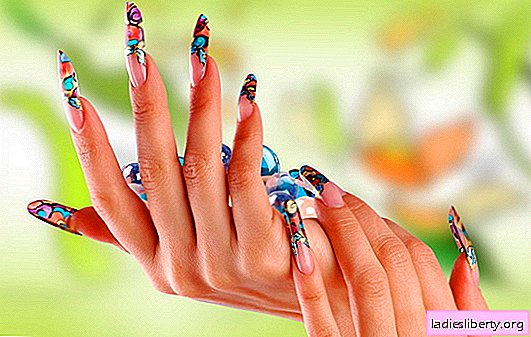
Manicure can rightly be called a calling card of every woman.
Hands, fingers are always in sight, and their condition and appearance can tell about their mistress even more than their faces.
Strict etiquette, among other things, requires nails to be short, but a democratic fashion allows you to go beyond and experiment.
A great time for a bright design of long nails is summer.
The design of long nails - what are the differences
Long nails require special care and accuracy. Many girls refuse the idea of such a manicure, referring to the fact that it is inconvenient to carry out daily tasks at home and at work. In fact, you can literally get used to washing dishes, typing on a computer and buttoning buttons with long nails in just a week.
But it is long nails that open before the master a wide field of activity. On it you can realize your wildest fantasies, use original jewelry and decorative elements. A similar design on long nails looks much more organic and luxurious than on short ones. And individual ideas are simply not suitable for them.
Design of long nails - different directions (photo)
Professional craftsmen are trying to use new technologies and techniques for applying varnish. There are several directions for the design of long nails that only gain or still do not lose their relevance:
1. Good old service jacket

The classic version provides white for the smile line and pink for the rest of the plate. French manicure is good for any length. You can diversify a rather boring color scheme by giving the tips various shades.
Also, this technique is the basis for creating the "French Millennium". In this case, spangles are applied to the overgrown nails. This is a great option for an evening out.
2. Geometry on the fingers

Artistic ornament has long conquered fashionistas. Special technologies are constantly being improved, which makes it possible to create original compositions with sharp corners. You can paint over the entire nail completely, dividing it into color segments, or use individual figures on a monophonic basis.
3. Ombre technology

It implies a gradual transition from one shade to another. To do this, you can use colors from one gamut or play in contrasts. The gradation from dark to light tones looks more spectacular.
4. Lunar manicure

Its feature is in emphasis on the nail hole. The smile line can be convex or concave. Two contrasting varnishes are used to create. For the first time such a manicure appeared at the Dior show. He immediately liked the girls who want to look bright, but at the same time do not dare to bold experiments.
5. Nail framed

The whole nail is painted in one color, and a frame is drawn along its edge. It can go all over its diameter or be “open” at the tips. For the inner filling, it is right to choose a light shade, but the frame should be bright, saturated or dark.
6. Metal nails

This type of manicure has another name - "mirror". It is performed using a special foil, which can be used to cover the entire nail plate or used to create individual decorative elements.
7. Negative space (empty space)

For such a manicure, absolutely any color will do. The key feature is not the shaded areas: it can be the space in the middle in the form of a rectangle, a flirty triangle on the side or strips of zigzag.
8. Glass neils ("broken glass")

Such nail art is only gaining its popularity. The idea was born in South Korea and is gradually migrating to world catwalks. Designs on long nails are created using special stickers. Various geometric shapes are cut out of them (mainly rhombuses, trapezoids and triangles) and glued to the nail.
The mentioned design technologies can be combined. This allows fashionistas to try everything at once, as well as create a literally original and stylish manicure. You can combine, for example, a jacket and a moon manicure or a moon manicure and a frame.
To create a similar design of long nails, you need to think through the whole concept in advance. The color scheme should include 3 tones, if not to talk about "geometry", "fan-french" or other types of art painting. In this case, there can be any number of shades.
As an example, you can take a bright evening manicure. Colors: burgundy, pale pink and golden with sparkles. The index, middle and little fingers can be covered only with a pink tint, and “involvement” in other tones can be emphasized with a drop in the form of a heart at the base of the plate. Replace it with small round rhinestones in tone to burgundy. The index finger is completely covered with sparkles. On the nameless one, perform a lunar manicure with a concave burgundy smile line, and shade the hole with a special golden foil.
Each of these types can be performed on nails of any shape. Recently, a special preference is given to rectangular nails. Although "cat's claws" do not go out of fashion - the spiky shape. She is more suitable for brave and confident ladies who know their worth, know how to be strong and feminine at the same time.
Far in the background are an oval shape. It is believed that it is more suitable for older women. Another statement from professionals that oval nails should be of small length.
The so-called coffin nails can be considered a novelty. Behind such a terrible name lies a rather cute shape - it is something in between the rectangular and sharp nails. They are significantly rounded, but do not have a sharp tip. Critics first saw a novelty on the red carpet in Hollywood on the fingers of local stars.
Design of long nails - sequence of actions
The first step towards a beautiful design of long nails is their immediate preparation:
• remove the remnants of the previous manicure, especially varnish;
• hold your hands in warm water (you can add gentle cream soap) for 10-15 minutes;
• get your hands wet and apply moisturizing oil to the cuticle area;
• carefully push back the cuticle and cut off the side burrs with tweezers;
• wipe off the remaining oil soaked in a nail polish remover.
After that, you can begin to work with the form: even long nails require some shortening and correction. During the processing of the edges with a nail file, you must not forget about the nail plate itself - remove the peeling pieces, give it smoothness.
The next step is a base gel coating. A small amount of the product should be collected on the brush and begin application from the free edge of the nail. This is done with light rubbing movements. Basic gel polish acts as a primer: it should make the nail smooth and even. His second task is to ensure the molecular adhesion of the main varnish to the plate. It is important to apply the base thinly. The layer that has already been dried under the lamp needs to be slightly trimmed to prevent the varnish from spreading to the rollers.
After drying, you can start applying colored varnish or creating a design of long nails. It is necessary to think over the idea in advance and prepare all the necessary materials. You may need not only a few bottles, but also strips, rhinestones, a few needles, beads and more.

After decorating the nails, it is imperative to apply the final gel polish. It will fix the beauty, will protect it from cracks and dullness. It is also necessary to apply the product with a thin layer, carefully painting over the places at the base of the nail. The coating is thoroughly dried under the lamp. After this, you need to wipe the nails with a special tool that protects the skin of the fingers from drying out, and gives the nails a glossy shine.
Long Nail Design - Professional Tips
A beginner in the design of long nails is unlikely to compete with the skill of a professional. But a neat and assiduous fashionista is still able to "get her hand" in this difficult matter. So that the process of training and creating nail masterpieces goes perfectly, you should listen to the useful recommendations of specialists:
1. Living conditions often do not contribute to the long life of long nails. And if it so happened that one of the crashes or is noticeably damaged, the others will have to be shortened, otherwise, the manicure will look sloppy.
2. When shaping the nails, you should focus on the fingers, which have rollers near the plate. Their grazing causes severe pain.
3. If you want to make a beautiful manicure, you can focus not only on fashion trends, but also on the shade of your own skin:
• for skin shades of ivory suitable copper and red shades;
• plum and berry tones emphasize the nobility of pale skin;
• owners of dark skin should pay attention to the cool color scheme.
4. Before applying gel polish, carefully prepare the plate. From the nail, it is necessary to carefully remove the remnants of the previous marafet, dust, and also take care of its perfectly smoothness. Adhere to this rule at the stages of applying any coating. Otherwise, the product on the nails will bubble and go down in waves.
5. Even if this does not happen, the consequences of improper application may occur later. Gel polish will not last even half the promised period (21 days).
6. Manicure "gradient" (wave, ombre) looks amazing on long nails, and is done very simply. Two colored varnishes spill side by side. A toothpick is gently mixed at the border of contact. The sponge is dipped in the resulting liquid, and then applied to the nail. It will be possible to make a truly smooth transition if you connect 3-4 shades among themselves.
7. Perfectly straight lines in geometric manicure are obtained thanks to special sticky strips. From them you can cut small circles of different diameters, rhombuses or hearts.
8. You can make multi-colored dots and circles on nails by using various objects: hairpins or an eraser on the edge of a pencil.